PROCJAM / 7DFPS 2018, Day 5

PROCJAM, 7DFPS

Day 1, Day 2, Day 3, Day 4

Unity uses two programming languages:  C# and JavaScript.  I use C# because I like strongly-typed languages.  I want to see as many mistakes at compile-time as possible. But Tracery (which I used to generate Burning Man Camp names) is written in JavaScript. Can I just copy the files in to my project’s directory structure? No! Unity finds several errors in files that work just fine in a web browser.  Searching online reveals two people that ported Tracery to C# specifically for use in Unity.  Both authors caution that these ports are completely unsupported, but that’s good enough for me.  I assign a name to each city block, but displaying that name to the user requires learning how to use Unity’s UI features.  I don’t want to deal with that hassle, so I switch tasks!

The Temple was a giant blank cylinder, and the Man was standing on a similarly boring box. I create a Lathe algorithm to replace both.  The Lathe draws some line segments from bottom to top, then rotates that outline around the Y-axis, kinda like a vase.  This is quite-low-level compared to most of what I’ve built.  I’m not using built-in primitives or importing meshes I built in a 3D editor.  I’m creating the object one piece at a time while the game is running. Not only do I have to write nested loops to place each vertex, I have to remember what order I created them, because the triangles are one giant list of references to the one giant list of vertices.  Speed is important at this level, so I don’t get the luxury of a big tree structure of objects. After writing some triangles backwards, and forgetting a few numbers, I get a shape!

What is this? The light acts like it’s completely flat!  I had missed two things.

  1. Unity stores only one normal per vertex, so if two triangles share a vertex, Unity will smooth the join between those triangles.  I want the angular, low-poly look, so I don’t want any triangles to share vertexes.  A quick sketch shows that each vertex borders six triangles, so I have to edit my vertex generation loop so it creates six times as many verticex!  Now the triangle creation loop needs to use each of those vertices exactly once.  Yikes!
  2. The second step is to call the RecalculateNormals() function.  Much easier!

So much better!  You’ll notice that this temple is spikier than a vase.  That’s “star mode.”  I bring a piece of code over from my bodypaint generator that reduces  the radius of every other vertical row of vertices.

After finishing this project, I am ready to tackle some UI work. People won’t enjoy even the coolest game if they don’t know how to play, so I need to explain myself.  I add a title screen with a list of controls and a bit of story.  This is a game about copying photo.s. The original code name was “Art Fraud” But now i’m having second thoughts.  Taking photos in a magical, beautiful place seems so joyful and positive. Do I really want to flavor it as theft and subterfuge? As a compromise, I let the user select Light or Dark stories. There’s no mechanical difference, but the little paragraph re-contextualizes why one has these photos, and why one wants to re-create them.

PROCJAM / 7DFPS 2018: Day 4

PROCJAM, 7DFPS

Day 1, Day 2, Day 3

Building Burning Man is really fun, so I neglected the photography part of the game to generate even more types of things.  I happen to have an extensive list of galleries of photos from Burning Man, so I perused a few of them to see what types of tents and vehicles people used in their camps.  It turns out that’s the least interesting part of Burning Man.  Most people photograph the huge installations, the mutant vehicles, or their friends, not the tent they sleep in 3 hours a day.

I made a few tents, a small cargo truck, a “fifth wheel” trailer, and a school bus to put in camps, as well as a street sign for intersections.  I had to look up dimensions, because I want these objects be the proper size in the world.  I still create 3D models in Milkshape, a program I got almost 20 years ago to do Half-Life 1 mods.  This encourages a low-poly, flat-shaded styles, since I don’t have the skills or the tools to make fancier objects.

Now that I have these objects, how do I place them into the city blocks I have defined?  I have an algorithm for packing rectangles into a 2D space from last year’s PROCJAM entry: Spaceship Wrecker!

The constraints are different.  Instead of packing a per-determined list of parts into an unbounded space, I want to fill a bounded space with whatever will fit. I also had to pad the dimensions of these vehicles and structures, since people need space to walk between them.  I pick an object at random, and if I have to push it out of bounds to avoid colliding with objects that have already been placed, I discard that object and count a failure.  After a certain number of failures, I figure the camp is full and move on.  Since the algorithm pushes objects in all directions equally, it works well for squarish camps, but not for the very long camps at the far rim of the city.

This algorithm still needs improvement.  I could try something more like Tetris, where I try to fill things up from one end to the other, or I could just use the current algorithm at multiple points along the long campsite.  With relatively cheap, simple algorithms, and especially with the time constraints of a game jam, finding the most efficient solution may not be worth the trouble.

To make camps look unified, structures in a camp will have similar colors.  How similar? That varies by camp. The camp in the foreground above has blue, green, cyan, even purple, but the ones behind it are all green or all magenta.

So I planned to generate photos, and what am I generating?

  • Width, number, & spacing of radial & concentric roads
  • location & size of landmarks
  • Structure type, structure position, structure color, and range of structure color.in camps
  • Also photos, I guess

PROCJAM 2018: Photo Copy, Day 3

PROCJAM, 7DFPS

Day 1, Day 2

Now that the game could display photos and the player could move around to recreate them, I wanted something to photograph.  The weird snowy test map with its bright primitive shapes wasn’t doing it for me.  But what landscape could I create that would have cool landmarks and not be too hard to navigate.  Well, remember the toy I made back on day 1 that had no relation to this project?

Burning Man is a geometric city on a flat plain.  It can’t be too hard to generate radial and concentric streets, right?  Man in the middle, temple in the gap where the roads don’t touch. Simple, right?

Yeah, it’s pretty simple.  I’m approximating the concentric roads with straight segments between the radial roads, which mostly works.  After defining the roads, I defined “blocks”, spaces between roads where structures could go.  Most would be basic tents & shelters, but a few would be landmarks.

A mistake in the code that rotates the blocks into place created something that looked like the solar collectors from Blade Runner 2049.  While cool, that’s the wrong sci-fi alternate universe.

The block in the center will eventually be the giant “Man” statue, and the large cylinder will be the “temple”

These temporary assets are already more interesting than the old landscape.  The shape of the city creates pleasing leading lines.  I did increase the height of the player character and the AI photographer to 6 meters so they can see over the camps, but are still shorter than the landmarks.  Maybe they are piloting quadcopters. If so, I’ll have to remove the footstep sounds that came with the FPS controller.

PROCJAM / 7DFPS 2018: Photo Copy, Day 2

PROCJAM, 7DFPS

Day 1

Today I worked on mostly the non-procedural parts of the game.  Of course the procedural generation is the reason I’m doing the jam, but I have to build a game around it so that other people can actually find and experience what I generate.

Updates to the AI photographer were minor.  Instead of placing the camera completely anywhere on the terrain, I picked a distance from my selected landmark based on that landmark’s size.  Distance and a random angle gave me X & Z coordinates, and I ray-casted downwards to place the AI Photographer on the terrain.  That ensured the player could reach the same position.

Setting up the camera views were trickier.  Unity can send a camera’s output to something called a RenderTexture instead of the screen. I thought I’d make a few of these RenderTextures, get the AI photographer to render photos to them, then display them on the UI.  But I couldn’t figure out how to do that, despite clicking around in the Editor and the documentation for a while.

Instead I decided to have two cameras render to the same screen.  On the left, the player’s view, controllable with standard FPS controls.  On the right, the AI photographer’s view.  There’s a key to hide the AI photographer’s view and fill the screen with the normal FPS view.  There’s a nice transition where the FPS view shrinks and the AI photographer’s view slides in from the edge of the screen.  In photo comparison mode, both viewports are square, regardless of the window the game is running in.  Again, the player needs to be able to recreate the AI photographer’s photos perfectly, so the two views need to be identical.

With the cameras sorted, I was able to play the game!  Even in its simple form, with temporary assets and no scoring system, I found it very satisfying to match up every little thing in the photo.  I’m probably biased, since I really enjoy composing photographs with physical cameras, but it’s a good sign that this game is going to work.

PROCJAM 2018: Photo Copy, Day 1

I’m participating in PROCJAM, a low-pressure game jam whose motto is “Make Something That Makes Something.”

What should I generate?  I like photography, and I had an idea for teaching an AI to generate photographs of landmarks in a landscape. The player would walk through the landscape to the location where the photo was taken.  Breath of the Wild and Skyrim both have sidequests where players try to find a location based on a drawing or photograph, and I enjoy them.  I also relish the chance to pass some of my photographic knowledge on to an electronic protege. The player’s goal in my game is to replicate the generated photograph as closely as possible, so I call the game “Photo Copy.”

I had uninstalled the version of Unity I had used last year to create Spaceship Wrecker (play in your browser, blog post), and thought I might as well get the latest version instead of re-installing that one.  So I downloaded Unity 2018.2 and set about trying to mock up some test assets: some terrain with landmarks on it.

I didn’t enjoy sculpting the terrain in the Unity Editor. I wanted vertical walls around the edge to keep the player contained, and thought it would be easier to make them by drawing a heightmap in an image editor.  Alas, Unity only accepts heightmaps in .RAW format, and my image editors didn’t output to .RAW.  I found a tool that could import a normal image (BMP, PNG, or JPG) and output a RAW, so I had to use 3 programs to get my terrain.  GIMP -> L3TD -> Unity.

I needed normal FPS controls for the player to move around on the terrain.  Surely something like that is included, right?  Forum threads indicated it was, but those threads were old.  Previous versions had “Standard Assets” included as part of the installer, but this version didn’t.  I would have to use the Asset Store to download them separately.

Last year I used MonoDevelop as my code editor.  Visual Studio felt like overkill, and it was another account to create, another EULA to accept.  Unity 2018 dropped support for MonoDevelop.  Visual Studio was my only option.

Because of this sequence of frustrations, I uninstalled Unity and looked at some cool photos from Burning Man.  All the art installations and quirky camp themes are fun and inspiring.  I started another Tracery project to generate some wacky camps.  I’ve used Javascript and Tracery a lot, so starting a new project and getting some output was quick and easy!

I considered using Cheap Bots Done Quick, to put the output in a Twitter Bot, but I don’t see many benefits to that format, so I kept it on a local webpage. What a fun distraction that is not at all related to my PROCJAM project.

Feeling much better, I downloaded Unity 2017. Now I had the First Person Controller and could write code in MonoDevelop. Once i had the landmarks in the terrain, I made the first photography algorithm: place the camera in a random location, high above anything it might collide with, and point it at a random landmark.

It is technically a photo!  That was enough excitement for day 1.

Thinking about PROCJAM: Summer 2018

PROCJAM is back.  Last year I participated by creating Spaceship Wrecker. You can play it on itch and read about it on my blog.  I’m excited to create something new for the Summer jam this coming week.

What will I generate this time?  A more important question: how do I generate things?  What’s my approach to a generator?  I think of a procedural generator like an AI.  I don’t make artifacts. I make an artifact generator, and teach it how to make artifacts. The generator is an agent that should make good decisions, that is, decisions that lead to desired results.  A bad artifact is a failure of the algorithm.  The agent/generator also has to obey a list of constraints, rules of the space it operates in. This makes the generation similar to a simulation as well.

This way of thinking is evident in the generators I’ve made so far.

  • Level 1 Pathfinder characters made by the rules in the Core Rulebook, which fight according to those rules.
  • Bodypaint generator that imitates observed bodypaint patterns from the Fremont Solstice Parade
  • Spaceships with interdependent parts that break and take other parts offline.
  • Cities with supply chains, zoning, different species, etc.

Many generators leave the value judgement of their artifacts to human observers.  There are Twitter bots that generate artifacts constantly, and when one turns out to be funny or beautiful, its human followers will retweet or chuckle, thereby declaring that artifact good.  Building an algorithm to determine if something is “good” or “funny” is really hard, so omitting it makes development of these generators much easier.  But for some applications, quality control is necessary. For example, 90% of a video games levels had unreachable exits, it would be basically unplayable.

Eureka! I could make a game that’s explicitly about being a human and judging the quality of a procedurally generated artifact. The player is the leader of a group of thieves.  The player gets scouting reports about procedurally generated banks and museums and must decide if a heist is within his team’s capabilities.  After deciding, the player sees a simulation of the heist run by AI agents, and can see if his decision was correct.

This is similar to another idea (which I got from a Twitter bot) about playing as a D&D supplement writer. The player creates a dungeon, then simple AI agents play it a bunch of times and rate it. Was it fun? Did the agents win? Was it too long or too short?  The player and the game swap responsibilities for creating & judging artifacts, but other than that it’s the same.

So that’s my constraint-heavy style of procedural generation.  I now have even more ideas for PROCJAM than I did when I started writing this post.  The next nine days are going to be very interesting.

Thoughts about experience.

Most people know what “experience” means in the context of games, but defining a commonly-used term forces me to think about it concretely and precisely when I usually take it for granted, so I’m going to do it!

What is experience?

Lots of games have characters that grow over the course of the game, becoming more powerful and learning new abilities.  This ability to grow is usually represented by a currency called “experience.”  I’m going to abbreviate “experience” as EXP,  to indicate that it is a term with special meaning distinct from the usual meaning of the word.  EXP is gained by performing certain activities.  In some games, EXP is spent to purchase upgrades.  In others, reaching certain milestones of total EXP unlocks upgrades.

Why is EXP important?

Gaining EXP is a strong incentive. Players tend to perform activities that reward EXP over activities that don’t.  By changing which activities award EXP, and how much, game designers can influence their players’ behavior to suit the designers’ goals.

Common ways to gain EXP

Most of these examples are from video game shooters with “RPG elements”, RPG video games, and table top video games.

Individual EXP for killing enemies: In games where most situations are combat challenges, this method is obvious. The goal is to kill enemies, so reward the player who kills an enemy. This works well for single player games, but in multiplayer games, giving all the EXP to the player who lands the killing blow does not account for teamwork. If player A deals 90 damage to an enemy and Player B deals only the last 10 damage that kills it, player B will get the EXP and player A will feel cheated.

Individual EXP for assists: This is the obvious fix to the previous method.  Everyone who participates in killing an enemy gets some EXP. There are various ways to do this.

  • Full EXP for the killing blow and half EXP for anyone else who damaged the enemy.
  • Award EXP proportional to damage done.
  • Using a helpful ability on a player engaged with an enemy awards assist EXP when that enemy is killed.
  • Award assist EXP for using non-damaging abilities on an enemy, like knocking it down, pushing it out of position, and so on.

Making an attempt at fairness reveals how difficult it is to precisely define fairness.

EXP for completing objectives: This is mainly used in video game that have other things to do besides killing enemies.  Usually, most of the systems are about killing enemies, with some longer-term objectives on top, like “Control an area”, “Escort an object”, or “Capture a flag”. Accomplishing these objectives is another source of EXP, alongside killing enemies.  Some objectives (e.g. hold an area) award EXP equally to everyone involved. Others (e.g. capture the flag) award EXP to the player who accomplishes it, and maybe also to players who assisted that player.

Group EXP for overcoming obstacles:  This is common is video games and tabletop games where players form teams or parties.  Any accomplishment by the party awards equal EXP to all party members. Framing the achievement that grants EXP as “overcoming an obstacle” instead of “defeating an enemy” expands the types of situations that grant EXP: solving a mystery, navigating a hazardous area, convincing an NPC. It also handles solving a problem in multiple ways.  Players can get past a checkpoint by sneaking, fast-talking, or fighting, and get the same reward.  If combat is dangerous or expensive, players are encouraged to try non-violent solutions.

Group milestone leveling: This is used in tabletop games that emphasize story, Instead gaining EXP for every obstacle along the way, every player gaining a large amount of EXP for reaching a significant narrative milestone, like defeating a boss, or wrapping up a story arc.  This lets the GM choose how powerful the party will be at any point in the story, and less accounting is required of both players and GM.

EXP per skill: This is a paradigm shift that rewards players for their actions instead of for the effects those actions have.  Instead of one pool of EXP, characters have multiple pools, linked to skills or groups of skills.  For example, a character may have a “shooting” skill, and could gain “shooting EXP” for attempting to shoot, or for shooting and succeeding, or for succeeding on difficult shots.  “Shooting EXP” can only be used to improve shooting-related parts of the character.  This method keeps track of a lot more than other methods, so it’s usually limited to video games, where the computer can do all the math.

Ideas for gaining EXP

In team games, it’s good for players to work together and help each other.  How do we know when a player has been helpful to another?  Humans intuitively use a lot of context to decide what certain actions mean, and that’s hard for computers to emulate.  A computer would like to say “Healing a teammate is good”, but healing a tank that’s at 3/4 health while a squishy teammate dies is a mistake.  Most simple rules for what is helpful and what is not can be gamed: players who are motivated to gain the most EXP can find actions that make no sense diagetically, like standing in a fire to let a teammate get unlimited EXP for healing.

One way to answer “does this action help?” is to ask “If this action did not happen, would things be worse?”  That’s easier for turn-based games or games with fewer verbs. Predicting the future gets more expensive the more complicated each situation gets, and how far ahead one has to look.  Here’s a simple example.  In Pathfinder, a Bard gives the Fighter +3 to attack, and the Fighter’s next attack beats the enemies AC by 1.  Without the Bard’s Inspiration, the Fighter would have missed, so the Bard definitely helps!  Grant EXP!  But what if the Monk trips that same enemy, knocking it prone and reducing its AC by 4. Does the Fighter hit because of the Bard or because of the Monk?  Even in this turn-based example with chunky numbers, it’s hard to assign causes to results.

Another concern in team games is fairness. EXP is a positive feedback loop. Characters that perform better get more EXP and more power, and then perform even better.  Small differences in effectiveness are magnified over time, and it’s hard to have a team of characters with vastly different amounts of power.  Limiting that difference in power can keep players from feeling frustrated. One solution is to award EXP to the group, not to individuals, but that may lead to the “free rider problem.”  Another solution is a limit to the difference in EXP between party members. A very effective character would stop earning EXP until other characters caught up.  The powers granted by EXP could also reduce this problem by weakening the positive feedback loop. If characters grow mostly horizontally (more utility options, diversification) instead of vertically (bugger numbers), that characters that are far behind can still contribute (in a few areas) just as well as a character that is far ahead.

Bodypaint Generator: Code Clean Up

My first draft of the bodypaint generator was a bit hacky, so I went back and cleaned it up a bit.

I created “drawers” (things that draw, not parts of a dresser) that would draw different things: stars, letters, squares, etc.  I could add more than one “drawer” to a placer and fill the canvas with, say, half circles and half heart emojis.  But because I mis-used Javascript’s inheritance, I couldn’t create multiple copies of the same “drawer.” So half hearts and half smiley faces wouldn’t work, nor would half red stars with few points & half green stars with many points.  As the image below proves, I’ve removed that constraint. Now I can instantiate as many “drawers” as I like, of any type, and give them all different parameters.

The placing feature was mixed in with the top-level generator object.  I split it out to its own class, so I could make sub-classes and switch out or combine placers on one canvas just like I could use any combination of “drawers” with one placer.  To demonstrate the new placer’s extensibility, I implemented a grid placer in addition to the random placer I made earlier.

Finally I made some quality-of-life improvements to make testing easier for myself.

  1. A “regenerate” button so I can re-run the generator without re-loading the page.
  2. A “save to PNG” button so I don’t have to Print-Screen, paste into an image editor, and crop each time I want to add an image to my blog. (If you look carefully at previous entries about this program, the images are off by a few pixels.)

Bodypaint Generator: Just draw some spots

Now that I have all the photos from the Solstice Cyclists organized, I can start looking at cyclists, breaking down their paintjobs, and creating generators for them.

There are many ways I could implement the generator. Do I make an interactive webpage (Javascript, SVG) so that the public can create and modify paintjobs?  Since people are complicated three-dimensional objects, maybe I should use a 3D program, like Unity. To keep it simple, I’m using SVG.js to draw patterns on a square in a web browser. I’ll teach it about human bodies later.

The first cyclist I photographed just had some spots. (Here’s a photo. content warning: nudity)  How hard can drawing some spots be, right?  Harder than I thought.

Spots are mostly the same size, but not exactly,  so the generator has baseSize and sizeVariation parameters. I defined some constants for colors and had the generator pick a few each time.  Now it just has to place those spots randomly on the canvas.

Figure 1. Randomly placed spots.
Figure 2. randomly placed spots

This is not how a human would draw spots.  Some spots overlap, and the distribution of spots is very uneven.  Humans tend to draw spots roughly the same distance from each other, but will avoid placing the spots in a grid.  How can I imitate that behavior?

  1. define a reasonable distance between spots, but vary it a bit (baseDistance, distanceVariation)
  2. When placing a new spot, start from the position of the previous spot & move some distance in a random direction.
  3. Make sure that position is still on the canvas (bounds checking)
  4. Make sure that position isn’t too close to any other previous spot
  5. If placement fails, repeat step 2 again.
  6. If placement fails too many times, give up.

After writing a few helper functions for polar coordinates, I tried again.  I added a small white square to indicate an attempted placement that was rejected.

Figure 3. Place next spot near previous spot.

The spots don’t overlap or crowd each other anymore, but the algorithm tends to make chains of spots instead of filling regions.

Figure 4. Having trouble placing spots.

In Figure 4, the algorithm tried hundreds of times to place the last two spots. It should have given up after 10 attempts, but this bug accidentally visualizes the band of acceptable distances between spots.

In order to make the spots form clumps instead of chains, I changed where I tried to place the next spot.  Instead of placing near the previous spot, I’d try to place it near the first spot. If that failed a number of times, the region around the first spot must be too crowded, so I’ll try near the second spot, then the third, and so on.

Figure 5. A clump of spots
Figure 6. Failed placements visualized

This looks more like what I would produce if I was drawing spots on a piece of paper, or someone’s skin. Figure 6 shows that the algorithm fails to place a spot quite often, but the execution is still fast enough to seem real-time to a human observer. I may have to worry about efficiency later, but for now it’s fine.

This algorithm has a maximum number of spots it attempts to place. If it can’t find an open space near any of the existing spots, it will give up early, but it also doesn’t keep going to fill the entire canvas. Fortunately, that’s an easy fix. Instead of looping a set number of times, use while(true), and then the emergency break statement becomes the normal way of exiting.

Figure 7. Enough spots to fill the canvas.
Figure 8. Enough spots to fill the canvas.

Now that I like the arrangement of spots, I can easily switch out the circles for anything with roughly the same dimensions: letters, stars, squares, or flowers.  This algorithm won’t work for objects that are significantly bigger in one dimension than another, like fish, words, or snakes.

In conclusion, I can fill a space with random spots in a way that imitates how a human would do it, which isn’t that random at all.

PROCJAM 2017: Spaceship Wrecker

PROCJAM is a relaxed game (or anything) jam with the motto “Make Something That Makes Something”. It basically ran from 4 NOV 2017 to 13 NOV 2017, but the organizers emphasize not stressing out about deadlines.

Procedural generation is my jam, as you may have noticed from my Pathfinder Twitterbots and the little generators on my site.  I didn’t want to generate terrain, caves/dungeons, or planets, because so many generators like that already exist.  I had no shortage of ideas to choose from, though.  Deciding which one to pursue took quite some time!  Some potential projects:

  • Generate spaceships from subsystems that produce & consume various resources
  • Generate fantasy creatures with different senses & capabilities, and individuals of those races who may have disabilities or mutations
  • Generate buildings that accommodate multiple fantasy creatures with widely varying needs.
  • A MUD Twitterbot with emoji visualization
  • Generate footprints that players can follow, and a field guide that identifies the creatures that leave the footprints.

The generators I want to make have lots of constraints and dependencies. Many generators are stateless: the number of projectiles the gun fires can be chosen without regard for the projectiles damage, or fire rate, or elemental affinity.  Not so the fantasy creatures, who won’t use a spoken language if they can’t hear, or the spacecraft, who can’t use a science lab without a generator to power it.  I feel the added complexity in generation is worth it, because it forces the generated artifacts to make sense.

I chose “Spaceship Wrecker”, which generates a spaceship full of subsystems, then lets the player launch an asteroid or bullet to damage some of those systems and watch the failures cascade across the ship. In my mind I envision players boarding wrecked spaceships, prying open airlocks, re-routing cables, and getting the ship back online, but let’s start small, build up incrementally, and see how far I get in a week.

What parts do I need, and what do they depend on?

  • Engines (move the ship)
  • Fuel tanks (supply the engines)
  • Generators (supply electrical power to all kinds of parts)
  • Life support (supply air to rooms with people in them)
  • Crew quarters (supply crew to operate various parts)
  • Command/cockpit/bridge
  • mission systems (sensors, cargo, labs, etc.)

This gave me my list of resources:

  • Air
  • Crew
  • Fuel
  • Power
  • Thrust (technically that’s two resources: engines overcome inertia with thrust, but it’s simpler to create demand for engines by saying that parts consume thrust.)

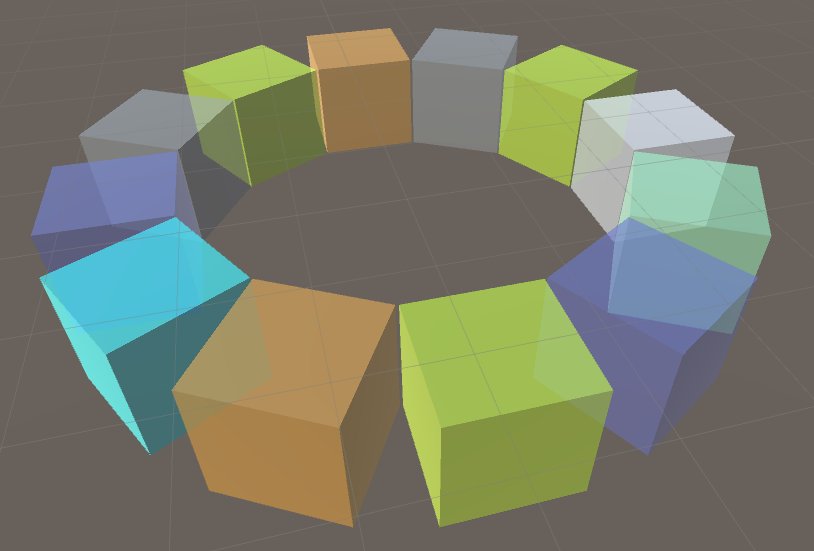
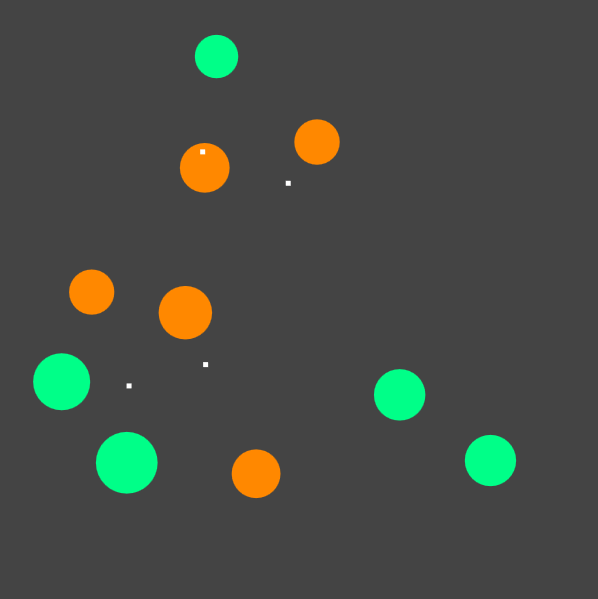
I built some placeholder assets as Unity prefabs: 1-meter cubes, color-coded by function, with positive or negative resource values to indicate what they produced and consumed. At first I kept track of supplies at the ship level. If the need for power across all parts on the ship was X, I added enough generators to supply X power.  I didn’t care which generators supplied which components yet.  I would add some graph system later to distribute the resources.

I could specify a few components to start with, and the generator would add components until all components were satisfied.  Fun edge case: a ship with no components has no unmet needs, and thus is a valid ship.

Right after finishing that working algorithm that created sensible ships, I changed my data model & threw that algorithm out for a better one.  I made “ResourceProducer” and “ResourceConsumer” components to add to spaceship parts. Producers could form connections to Consumers, so each component knew how its resources were allocated.  When a component was damaged (remember the player-launched asteroid?) it could notify its consumers that the supplies were gone. Those parts would shut down, and their producer components would revoke resources from other components, spreading destruction across the ship.

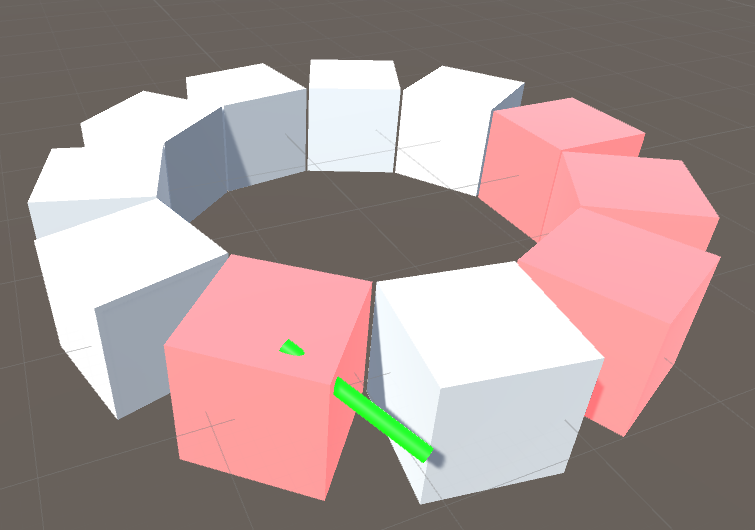
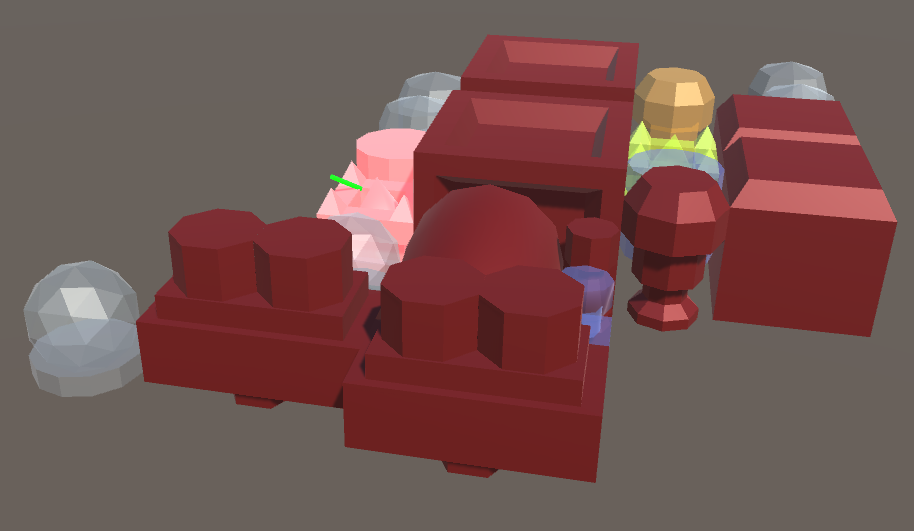
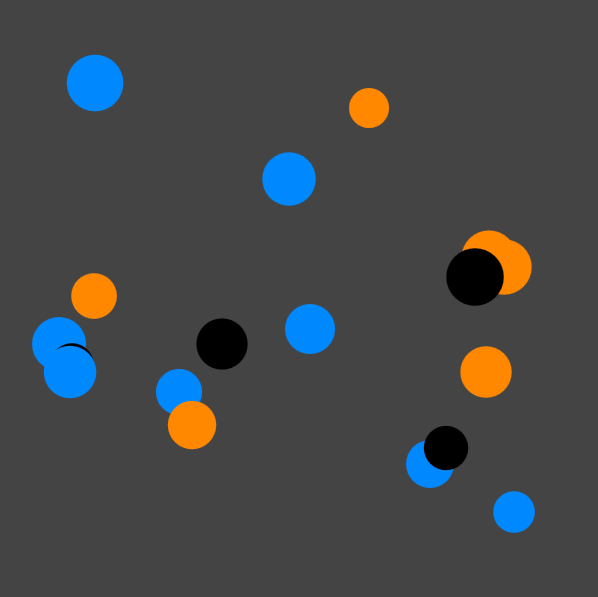
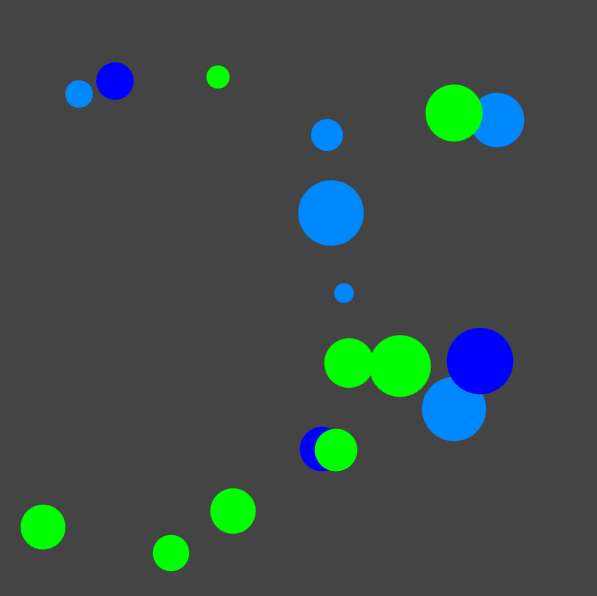
Here a part has been hit by an asteroid (indicated by the green line) and it turns red to show its not working. Events propagate and three other components also shut down.  Success!

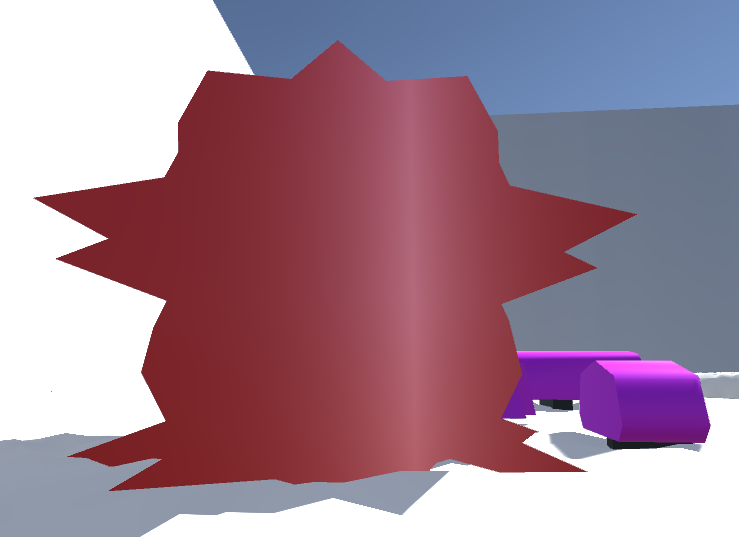
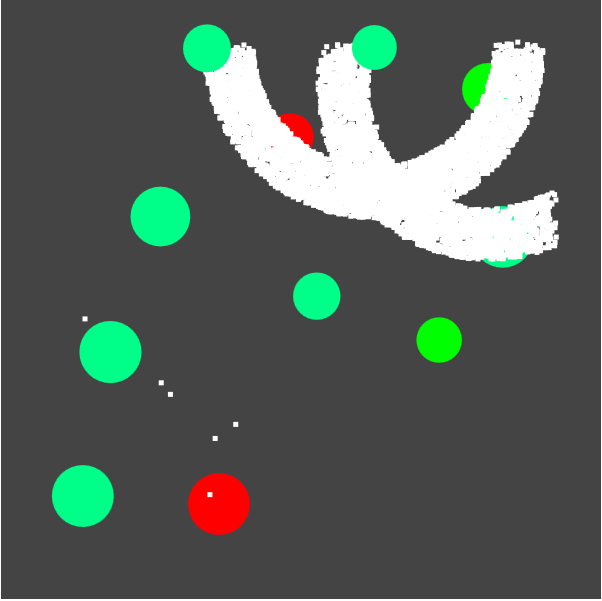
Let’s talk a bit about that asteroid. I imagine a tiny thing going extremely fast. Anything it hits is wrecked, and it penetrates to a significant depth. Multiple parts can go offline from the initial hit, if it’s lined up correctly.  I let the player orbit the ship with the camera, then click to launch the asteroid from the camera position to the cursor position. I RayCast to find the impact point, then spawn a trigger volume oriented in the same direction as the RayCast.  Spaceship parts know they are damaged when their colliders intersect with the trigger. I took a few tries to get the trigger volumes transform correct. I learned that some angle vectors contain Euler angles, so the 3 components degrees of rotation around each axis. Other angle vectors are unit vectors that point in the desired direction.

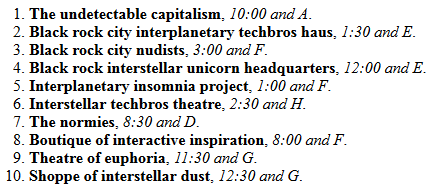
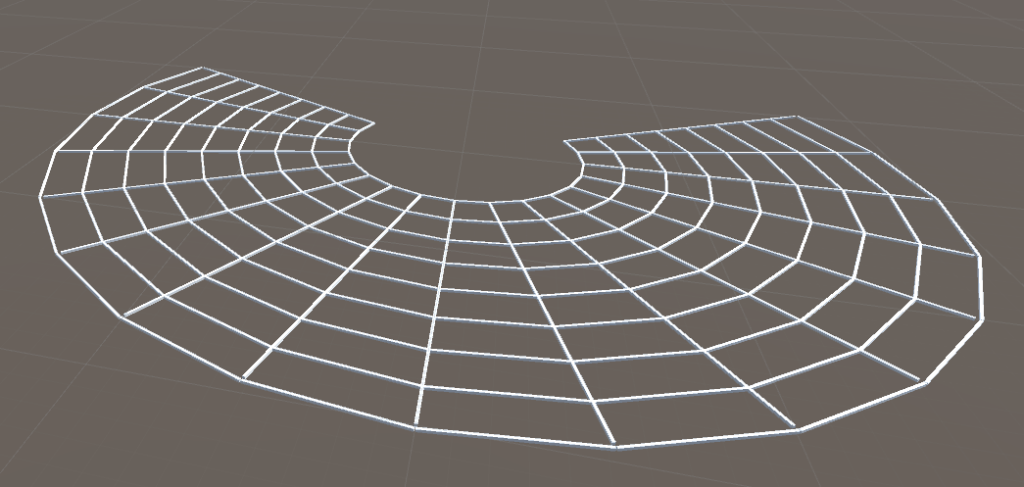
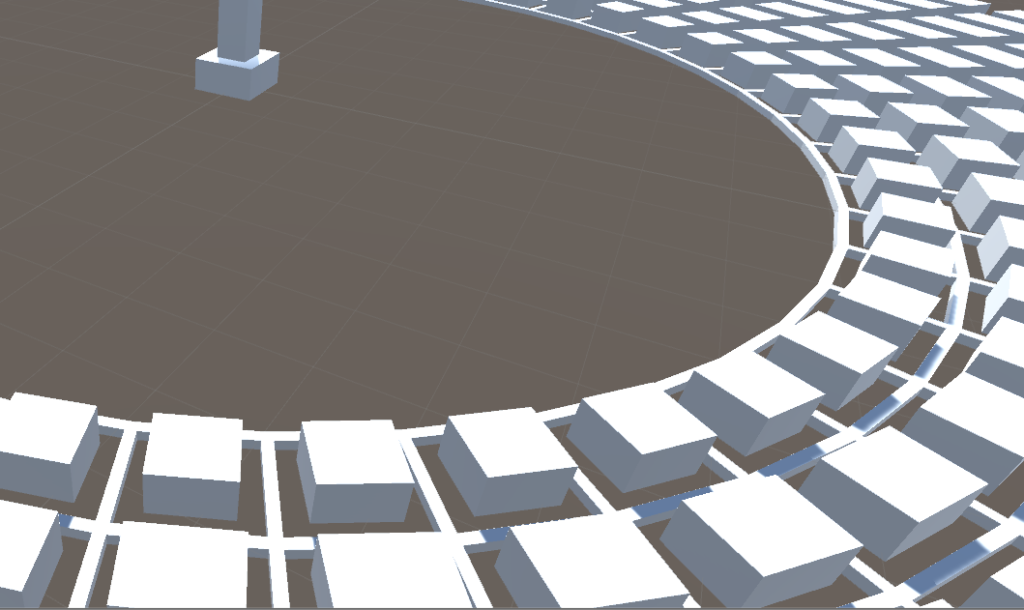
The ring structure was a placeholder for a more meaningful arrangement that I had been putting off because it was difficult. I wanted the parts clustered together because that’s how we envision cool spaceships and because the player could then line up asteroid impacts on multiple parts.  Parts should be connected by wires or corridors.  Parts that shared resources should be close together. Engines should be in the back. Fuel tanks should be far away from crew quarters. There were so many constraints I could place on the system!

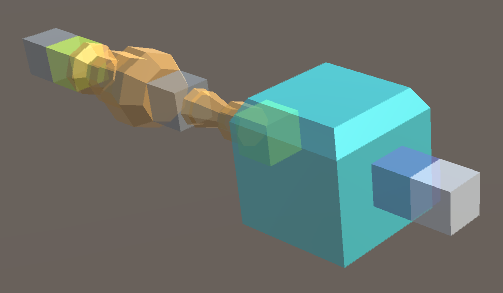
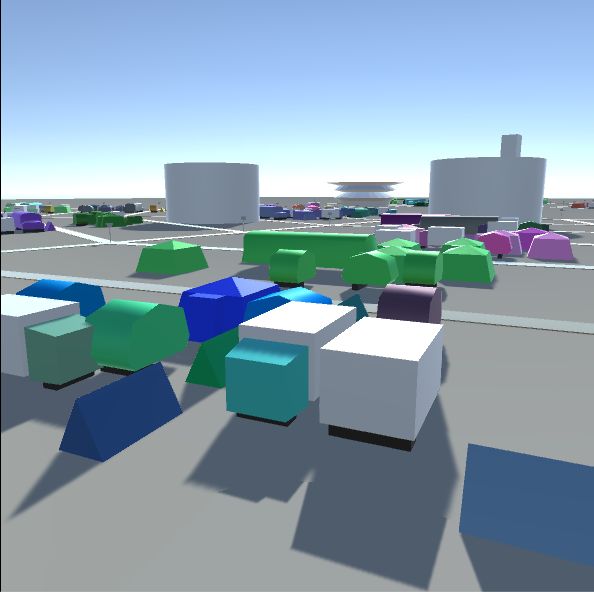
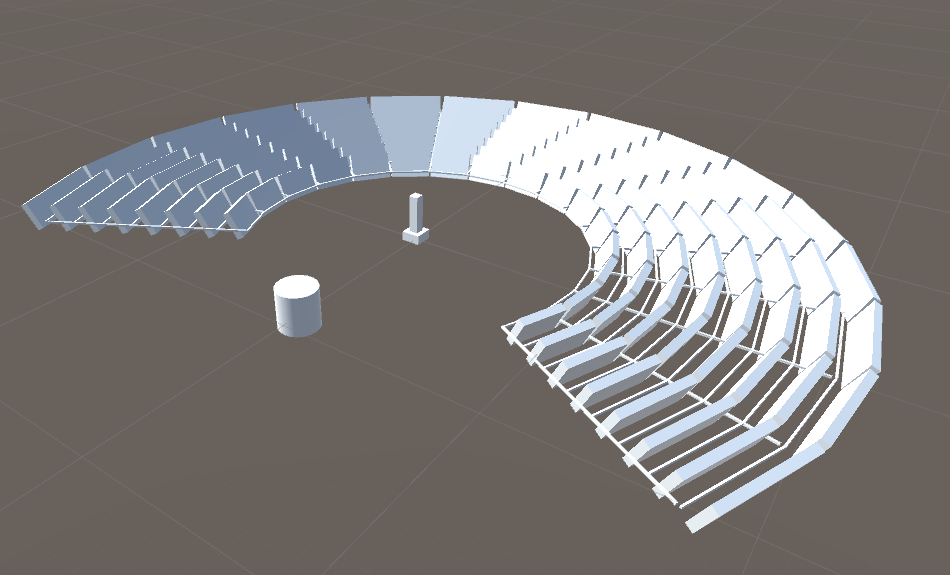
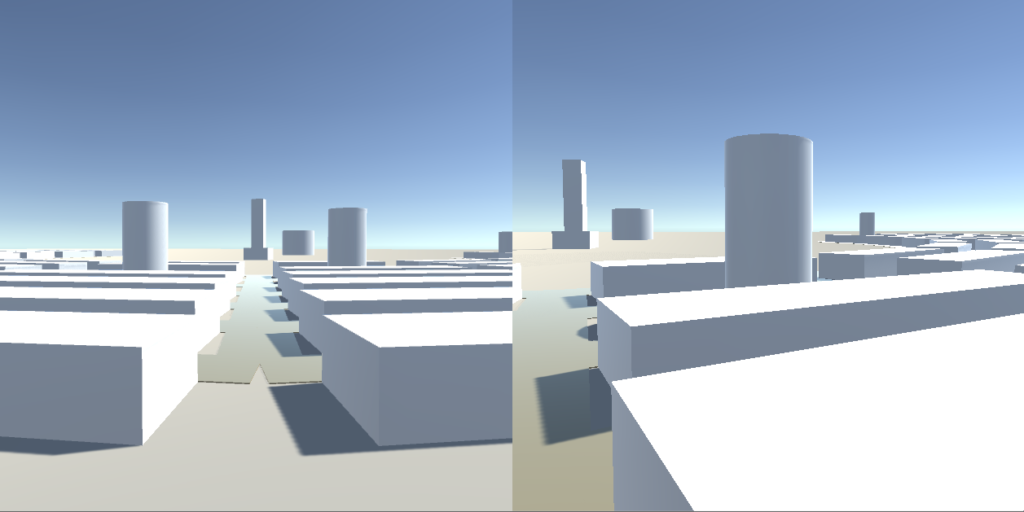
I was also replacing my 1-meter cubes with low-poly models of differing sizes.  I tried spawning parts with space in between them, and using SpringJoints to pull them together, but SpringJoints maintain distance. I found a way to push parts away from each other, but that’s the opposite of what I wanted.

I thought about trying to place parts at the origin, seeing if they collided with anything, and pushing them to the edge of that hitbox if they did. I wasn’t sure what would happen once several parts were placed, and the first push might push the new part out of one part and into another.

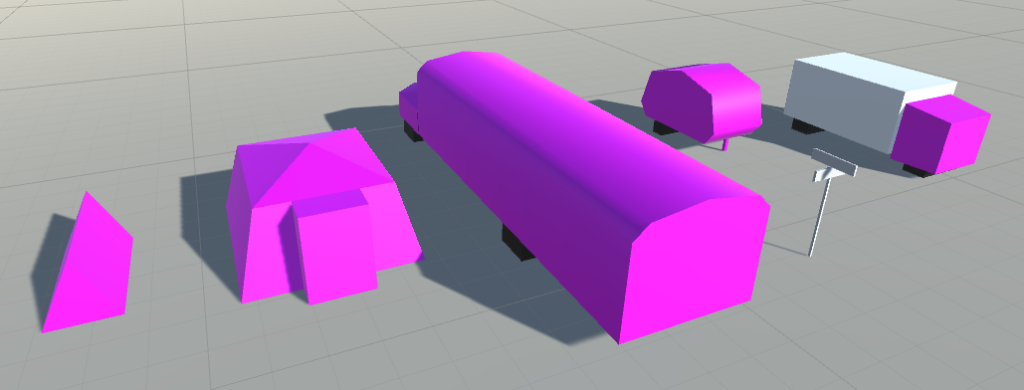
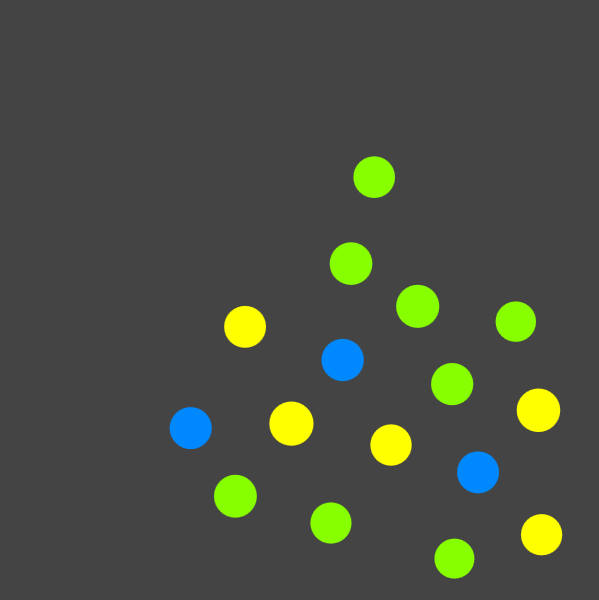
I made a 2D Boolean array in which each cell represented a square meter that was either empty or occupied. As I spawned a new part, I’d get its size from its collider & try to fit a box of that size into the grid, starting at the center. If it didn’t fit, I pushed it in a random direction until it did. So my ships expanded from the center and all the parts touched each other.

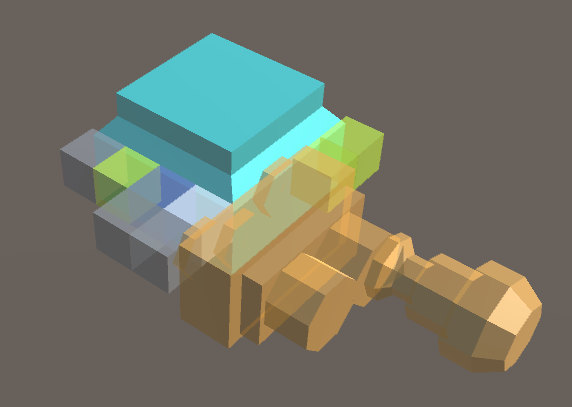
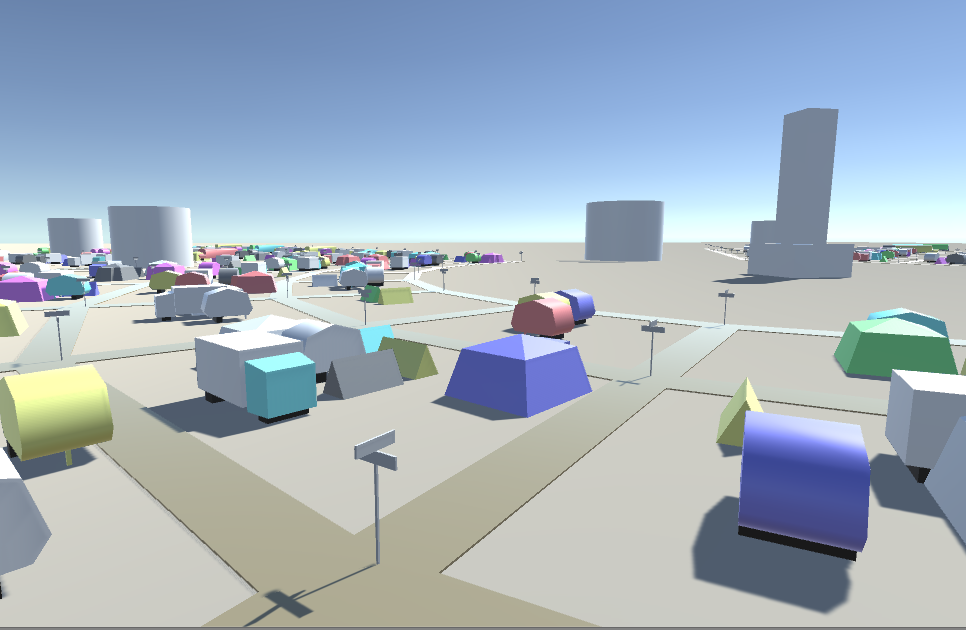
But the parts only knew that other parts took up space. Related parts didn’t cluster together, and engines pointed their nozzles into bedrooms. Some algorithm research revealed that the “bin packing” problem was NP-hard, so I felt better about not immediately knowing how to proceed. I decided to sidestep the problem by rotating the engines so their nozzles were pointing down. All the parts were on the same 2D plane, so there would never be a part below an engine to get scorched.  I finished replacing all the placeholders with low-poly models and felt pretty good about my complex creations.

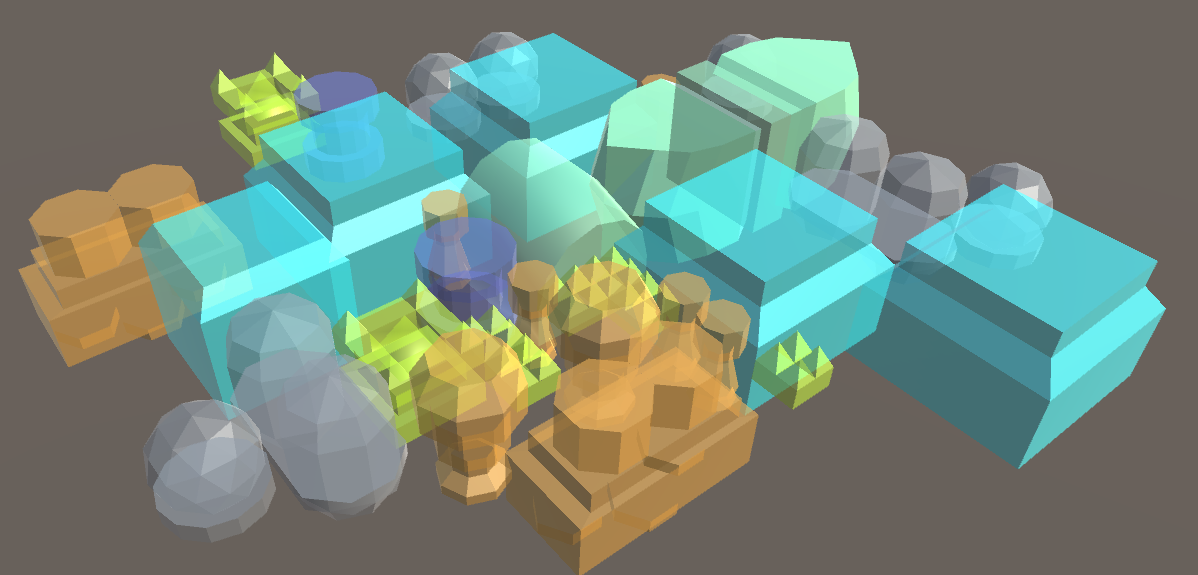
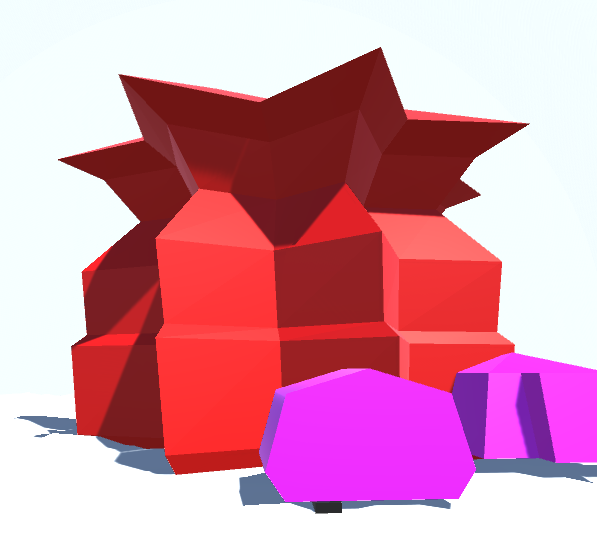
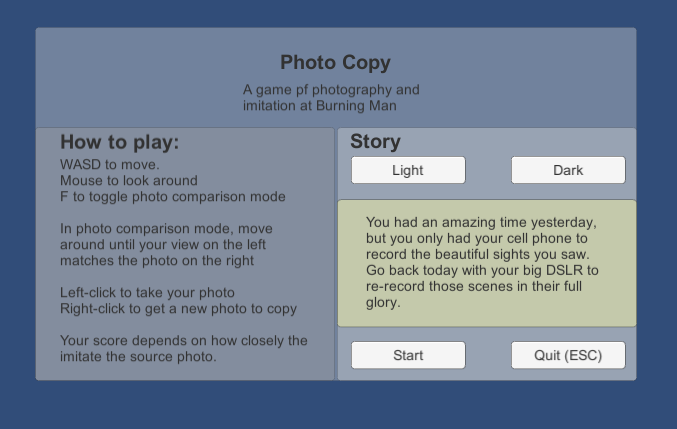
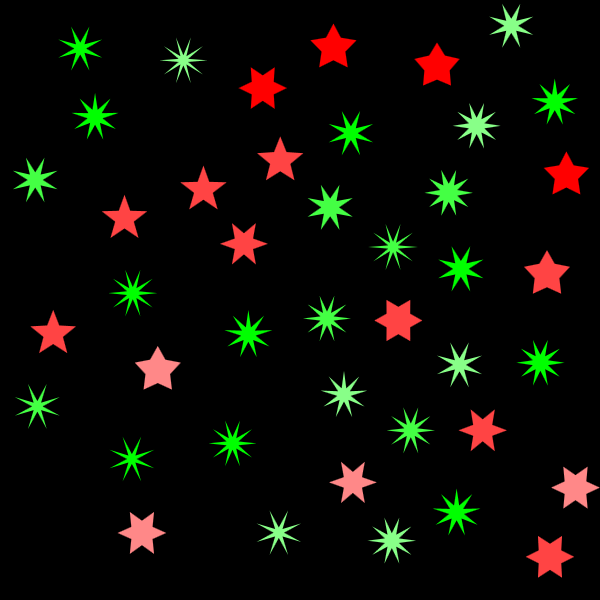
As a final step, I added another shader to differentiate between destroyed by the asteroid (bright pink) and shut down by system failure (dark red). I’m still looking to the future, when players go inside these ships to repair them.

So it’s done!  Basically. I should add some UI:instructions for how to interact with the ships. Of course, graphically indicating the connections between parts would be cool.  A spiral search is probably better than random walk for placing new components. A graph-based approach could improve co-location of related parts. It would be nice to have corridors for the crew to move through. Those could be hit by asteroids too, so each room would need airlocks. Are the airlocks dependent on main power to operate….?

Like I said, it’s basically done!